GitLab CI
以下示例展示了如何将 Turborepo 与 GitLab CI 结合使用。
¥The following example shows how to use Turborepo with GitLab CI.
对于给定的根 package.json:
¥For a given root package.json:
以及 turbo.json:
¥And a turbo.json:
在你的代码库中创建一个名为 .gitlab-ci.yml 的文件,其中包含以下内容:
¥Create a file called .gitlab-ci.yml in your repository with the following contents:
远程缓存
¥Remote Caching
要使用远程缓存,请检索提供程序的远程缓存的团队和令牌。在本例中,我们将使用 Vercel 远程缓存:
¥To use Remote Caching, retrieve the team and token for the Remote Cache for your provider. In this example, we'll use Vercel Remote Cache:
-
TURBO_TOKEN- 用于访问远程缓存的 Bearer 令牌¥
TURBO_TOKEN- The Bearer token to access the Remote Cache -
TURBO_TEAM- Vercel 团队用于共享工件的 slug¥
TURBO_TEAM- The slug of the Vercel team to share the artifacts with
要使用 Vercel 远程缓存,你可以通过以下几个步骤获取以下变量的值:
¥To use Vercel Remote Caching, you can get the value of these variables in a few steps:
-
在 Vercel 仪表板 中为你的账户创建一个作用域访问令牌
¥Create a Scoped Access Token to your account in the Vercel Dashboard
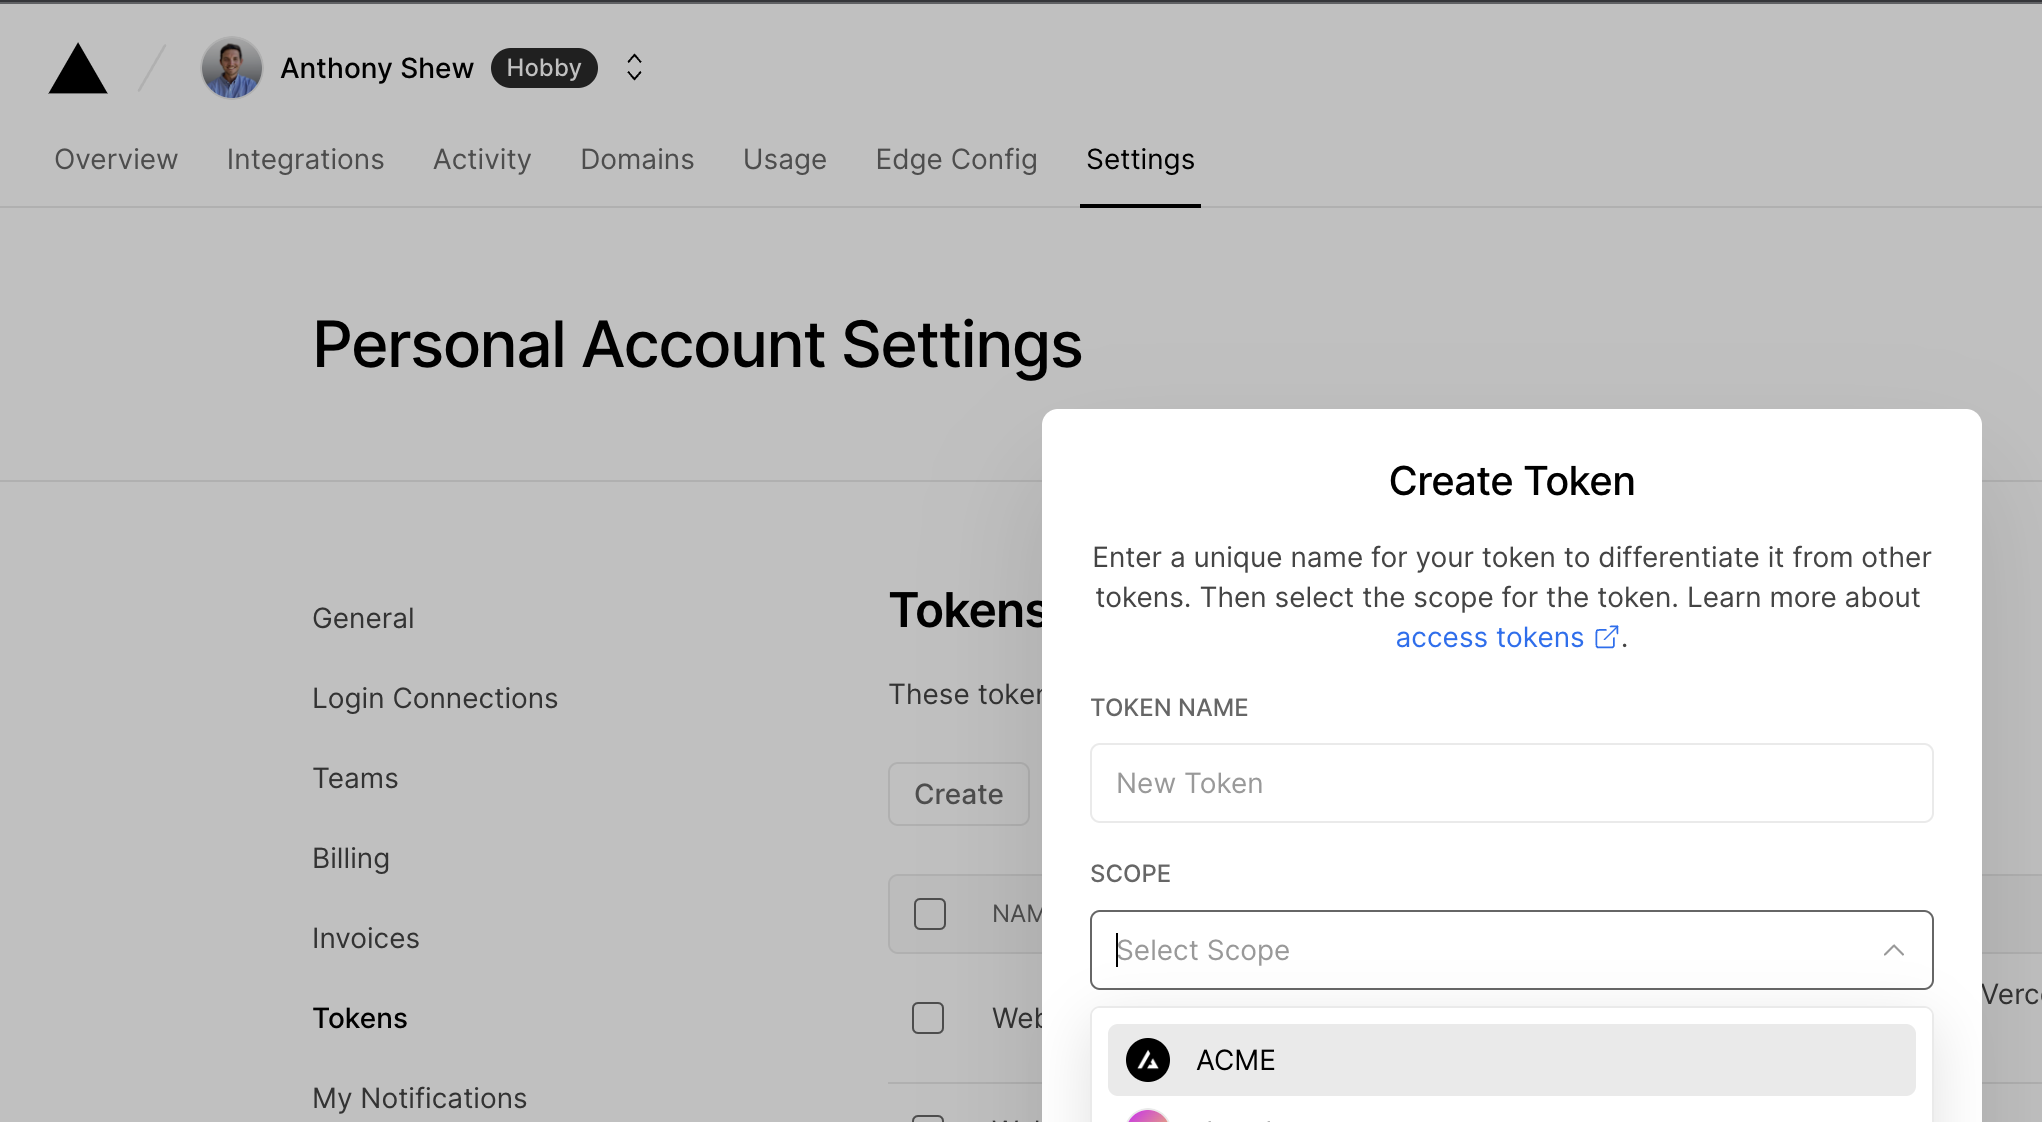
将值复制到安全的地方。你稍后会需要它。
¥Copy the value to a safe place. You'll need it in a moment.
-
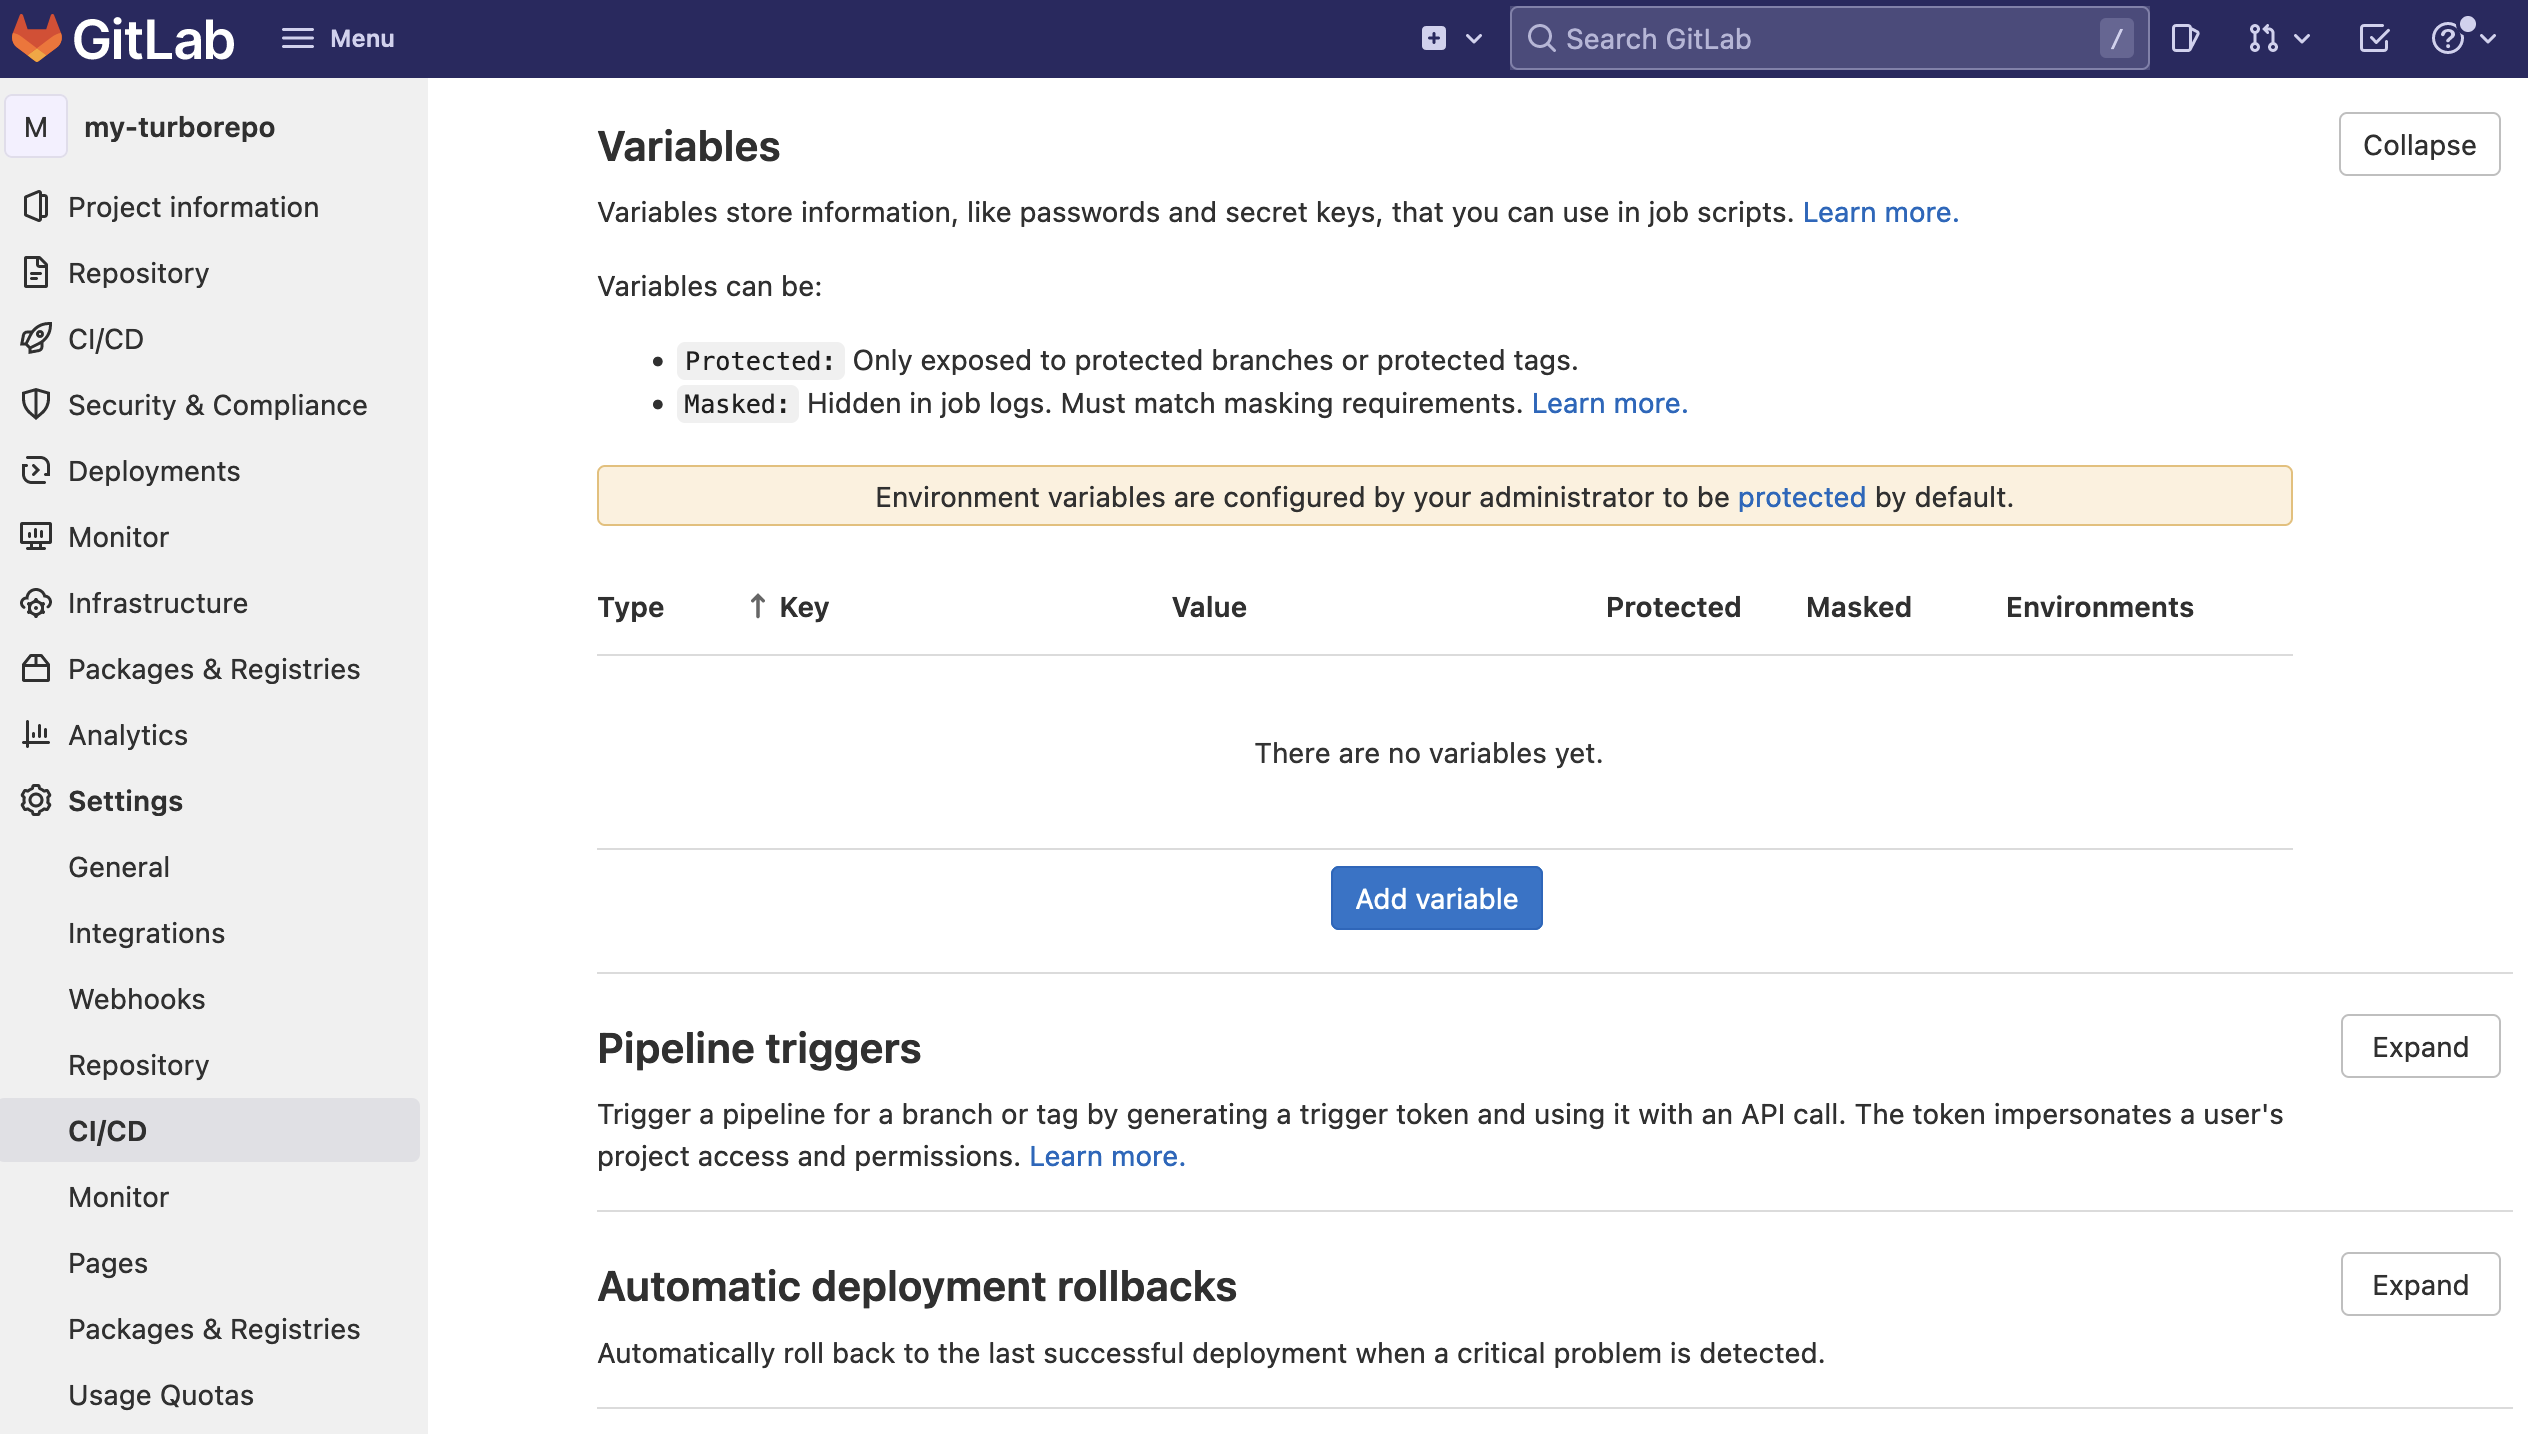
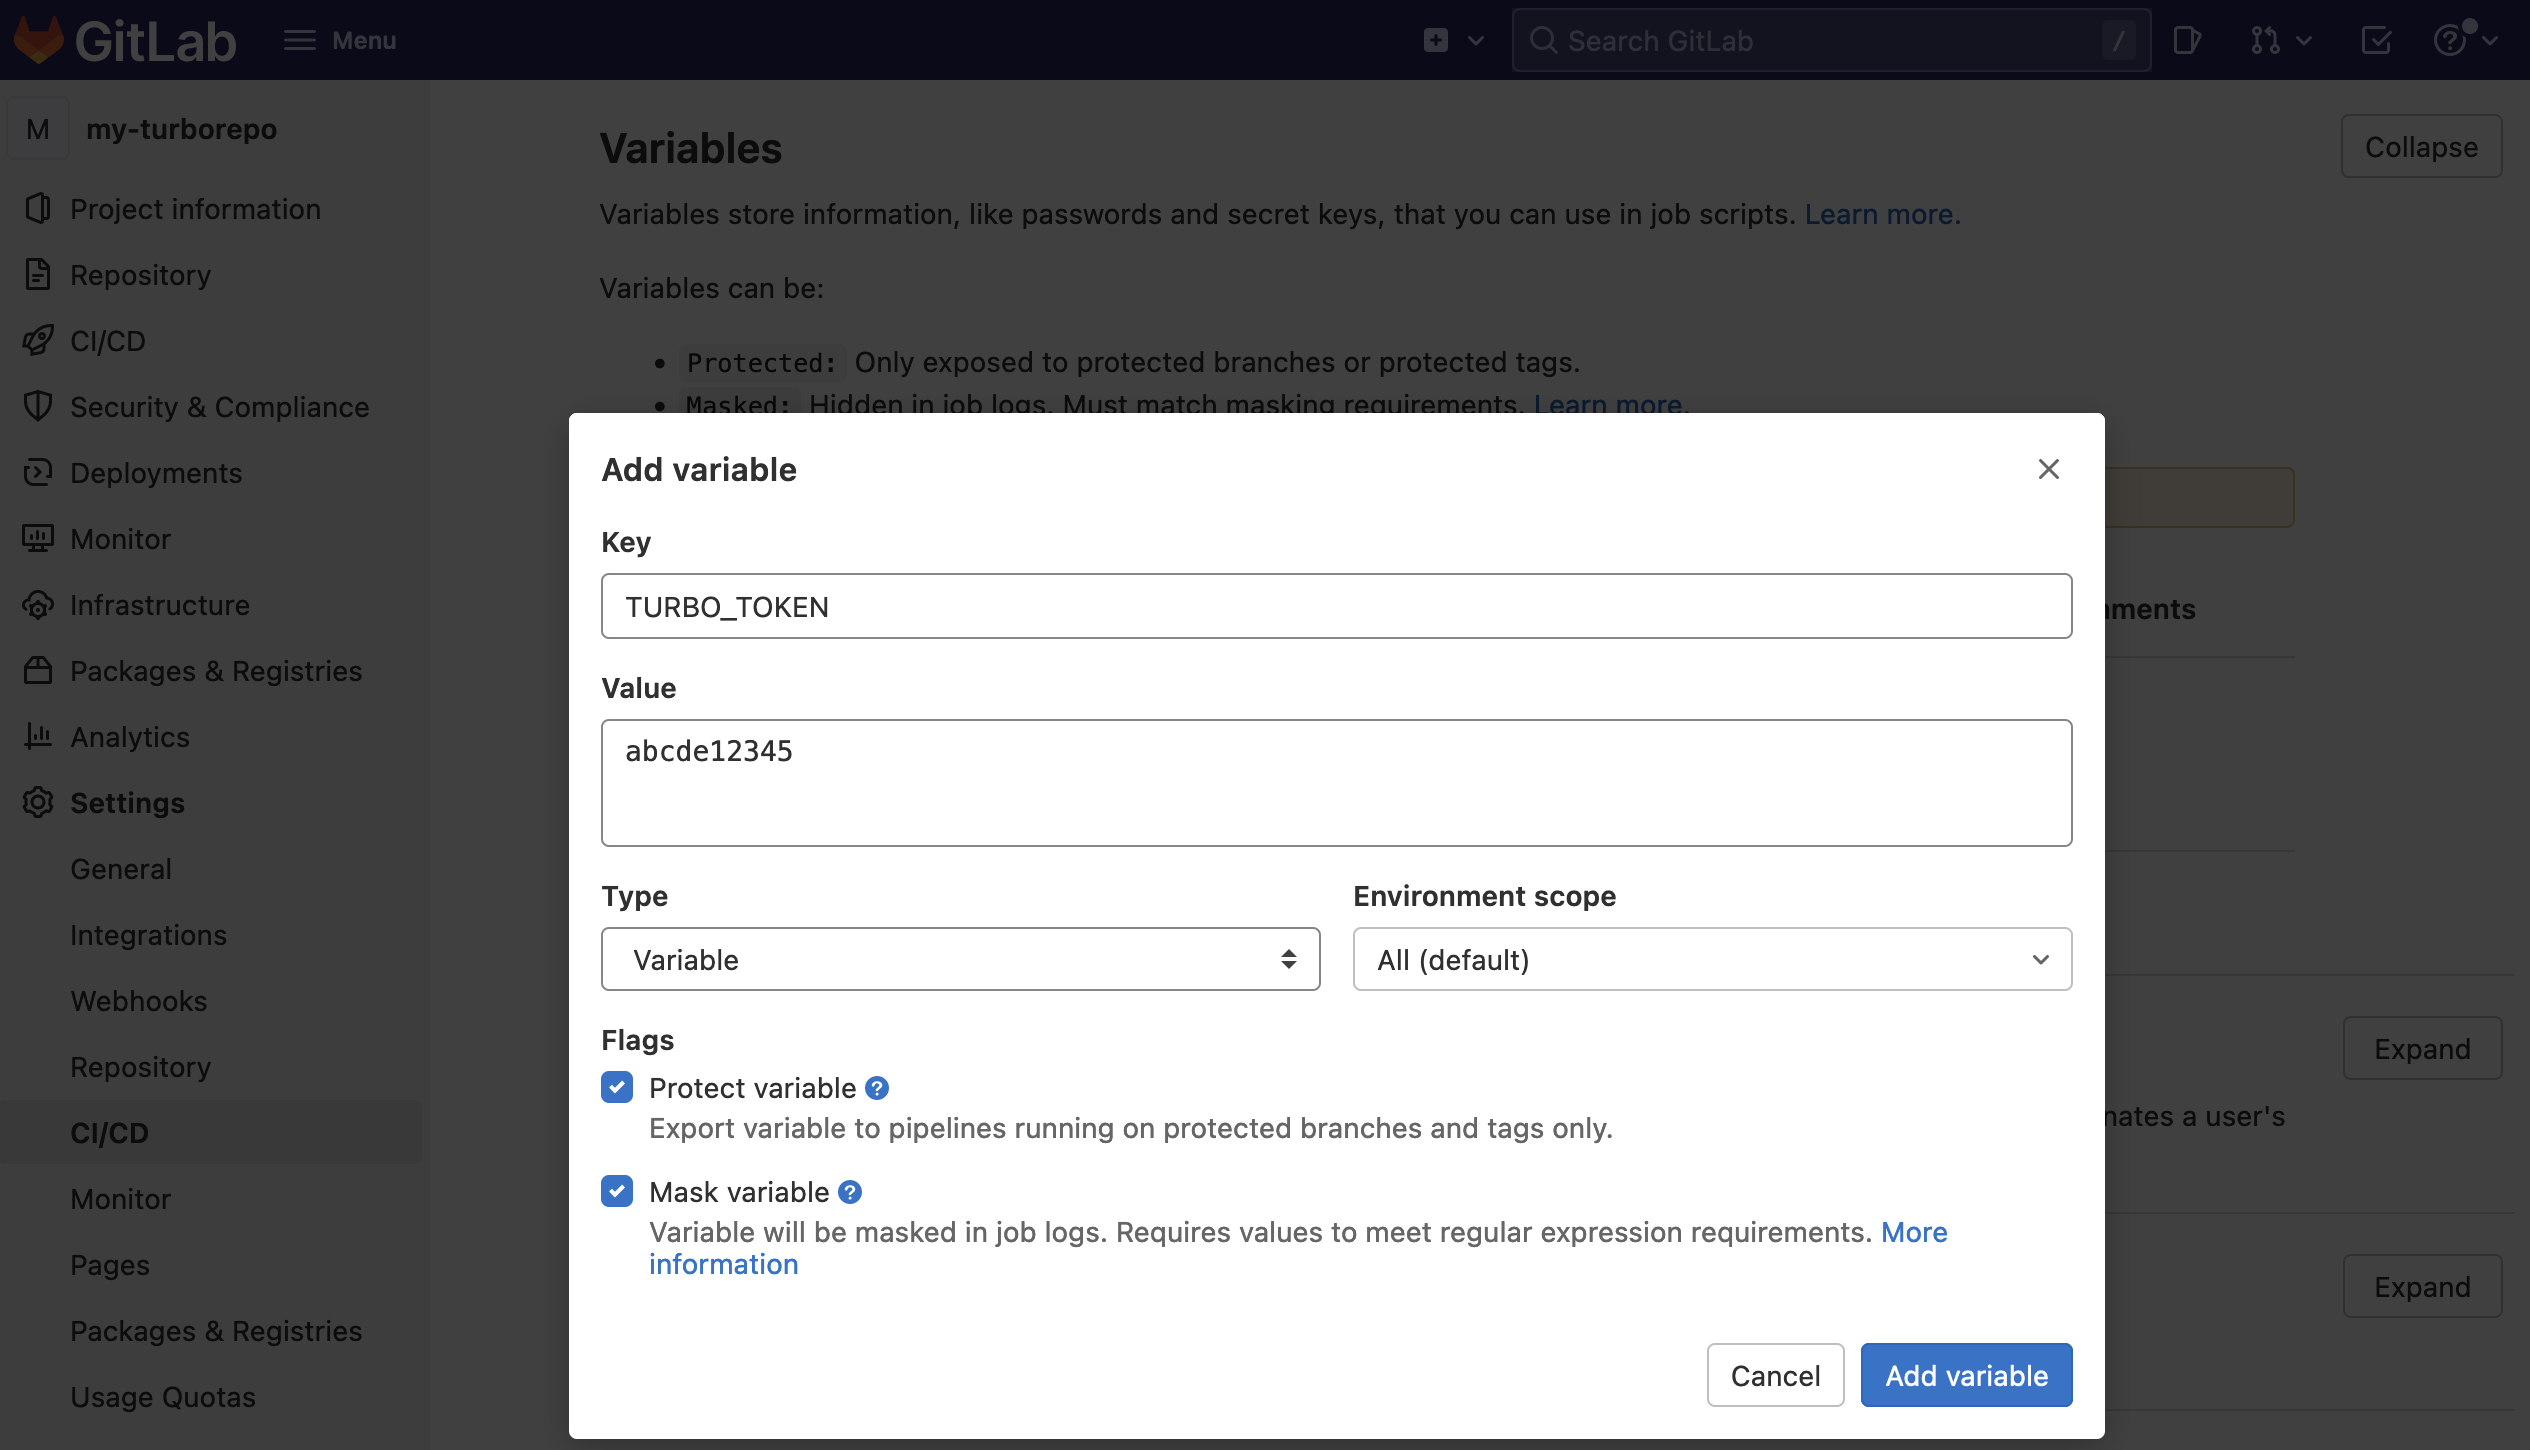
转到 GitLab 仓库设置,然后点击“设置”选项卡,然后点击“CI/CD”选项卡。创建一个名为
TURBO_TOKEN的新变量,并输入你的作用域访问令牌的值。¥Go to your GitLab repository settings and click on the Settings and then CI/CD tab. Create a new variable called
TURBO_TOKENand enter the value of your Scoped Access Token.
-
创建第二个名为
TURBO_TEAM的密钥,并将其设置为你的团队别名 - 你的团队 URL 中vercel.com/之后的部分。例如,vercel.com/acme的别名是acme。¥Make a second secret called
TURBO_TEAMand set it to your team slug - the part aftervercel.com/in your Team URL. For example, the slug forvercel.com/acmeisacme.
远程缓存现在可以在你的 GitLab 工作流程中运行。
¥Remote Caching will now be operational in your GitLab workflows.